Showing posts with label Tutorial. Show all posts

Monday, 17 September 2012

Spa Slippers

Before we went away I ditched my old house slippers. I know they are not really very ‘in’ but I really don’t like walking around the house barefoot. Once home i needed to replace them so I got out the sewing machine. That sounds easy doesn’t it? First I needed to spend lots of time cleaning up my sewing area. That done I quickly whipped up me new slippers.

OLYMPUS DIGITAL CAMERA

I followed the tutorial over here. I followed it to the letter except I used a pair of sandals to trace the sole as I don’t own a pair of thongs. If I make another pair I would change the construction but I was very happy with the end product.

Sunday, 19 August 2012

The Crafter’s Way 240–Fortune Cookies

We made these as a little bit of fun to wrap up the party. Bowls of fortune cookies were placed on the tables when we brought coffee out.

You will need: decorative paper, hot glue gun, scissors and fortunes.

Step 1: using a glass trace off a heap of circles and cut them out. Again if you have a punch use it.

OLYMPUS DIGITAL CAMERA

Step 2: Fold the circle in half but only crease 2 cm across the middle, as indicated by the arrow. DO NOT crease all the way across.

OLYMPUS DIGITAL CAMERA

Step 3: Open out the circle and fold in half in the other direction. DO NOT crease.

OLYMPUS DIGITAL CAMERA

Step 4: Slide the fortune inside. Gently indent the crease from the first fold.

OLYMPUS DIGITAL CAMERA

Step 5: Add a drop of hot glue. You do not need much.

OLYMPUS DIGITAL CAMERA

Step 6: Fold the wings back holding the glued edges until set.

OLYMPUS DIGITAL CAMERA

Repeat until you have enough for all your guests.

You may like to write your own fortunes however I have included a link to a site that has romantic, comic and motivational fortunes for you to print off.

http://www.chinese-fortune-cookie.com/

This is my last column for The Messenger. I would like to say a huge thank you to all the readers who have actively enjoyed the column. I hope I have inspired you to let your creative spirit go free and have a play.

Sunday, 12 August 2012

The Crafter’s Way 239–Wrapping Paper

Here are 3 fun ways to decorate tissue paper/butchers paper to make your own unique wrapping papers. OLYMPUS DIGITAL CAMERA         Idea 1: Fold the tissue paper into triangles and/or rectangles. OLYMPUS DIGITAL CAMERA         Pour some dye or food colouring into a container with a neck wide enough for you to dip into. Hold one edge of the paper shape and dip the paper into the liquid. You don’t need to dip too far in, the colour will wick (travel) up the paper. OLYMPUS DIGITAL CAMERA         Continue dipping, changing colour every now and then, until the shape is completely coloured. Let the paper dry completely before unfolding. Idea 2: It doesn’t come any easier than this. Grab some acrylic paints and some sponge shapes. OLYMPUS DIGITAL CAMERA         Dip the sponge into the paint and then remove most of it. The sponge doesn’t need to be overloaded. OLYMPUS DIGITAL CAMERA         Stamp away until you are happy with your design. OLYMPUS DIGITAL CAMERA         Idea 3: After doing the demonstration piece on Tissue Paper I would recommend using Butchers Paper for this project. Using left over crayon pieces and a vegetable peeler scrape the crayon onto the paper. OLYMPUS DIGITAL CAMERA         Cover the paper with baking paper and iron. OLYMPUS DIGITAL CAMERA         If you are using tissue paper place baking paper underneath or the melted crayon will leak onto your ironing board cover (which is why I recommend butchers paper). OLYMPUS DIGITAL CAMERA         Be careful as the crayon can be deceptively hot and unmelted pieces can stick to your fingers and burn you. Just remember that for all of these projects colour mixing rules apply. The dye, paint and crayons will run together so consider your colour choices carefully to avoid a muddy brown mess.


Sunday, 5 August 2012

The Crafter’s Way 238- More Party Decorations


When I was first asked to create some party decorations for a friend’s upcoming event I really wanted to make these doily decorations. I whipped up some samples but our DIY challenged hostess wanted to go with the fluffy pompoms instead. Never mind they may be just what another party hostess is looking for.

OLYMPUS DIGITAL CAMERA

You will need: paper doilies, dye or food colouring, non- stick surface for working on, glue and ribbon for hanging.

Step 1: Place the doilies into a dye bath. If you choose to use food colouring pop a few drops into water before dipping the doilies. You will need to be very gentle as paper is very fragile when wet. Let the doilies dry thoroughly.

doily hanging2

Step 2: If the doilies are a little crinkled you will need to give them a press with a cool iron. You need them flat.

Step 3: For each hanging you will need a minimum of 4 doilies. Stack the doilies on top of each other lining up the scallops.

doily hanging 3

Step 4: Fold the stack in half, again lining up the scallops. Fold the crease firmly. Separate into the single sheets again.

doily hanging 4

Step 5: Working on the non stick surface squeeze glue on to one half of the first doily. Spread out making sure you go all the way to the edge.

doily hanging 5

Step 6: Pick up the second doily. Align the scalloped edge and press to the glued half.

doily hanging 6

If you are making a heap of these hangings do step 5 & 6 with all of them before proceeding. It gives the glue time t dry and makes handling much easier.

Step 7: Glue half of the second doily then press the third doily in place. Continue until you have only ‘half’ surface left to glue.

Step 8: Cut a length of ribbon. Glue the surface. Fold the ribbon in half and press to the glue. Then quickly press the last surface to the glued surface. Let dry before hanging.

Variations can be achieved by using different sized doilies and by mixing the colours used in each hanging.

Sunday, 1 July 2012

The Crafter’s Way 224– Paper Table Runner

Flower Centrepiece 4

We’re Having A Party! Not me personally but I have been roped into the decorating committee of one. The hostess has chosen her colour theme of pink and red. I tried to suggest the addition of purple but no go. Never mind I will just have to wear those shoes I bought somewhere else.

The first item we decided on was the table decorations. The hostess wanted lots of flower but the expense was prohibitive so we decided to make our own. Even our DIY challenged hostess was able to help make these.

We used: Tissue Paper in our chosen colours; scissors and staples.

Flower Centrepiece 1

Step 1: Open out the tissue paper but don’t separate the sheets. The tissue paper I bought had 10 sheets. If you have a large flower punch use that, it will be much quicker. I don’t have one so I traced a circle onto cardboard then scalloped the edges. Place the card onto the tissue paper and trace out.

Step 2: I placed a couple of staples into the centre of each flower before cutting out. It helped hold the 10 sheets together and made cutting out quicker.

Flower Centrepiece 2

Step 3: When you have cut out all your shapes you can start forming the flower. Gently separate the first layer of tissue paper from the rest. Twist it up tightly toward the centre.

Flower Centrepiece 3

Step 4: Continue pulling each layer of tissue up toward the centre. As you work out don’t pull the layers so tightly. Continue until there are no more layers. Gently shape petals into flower shape.

We arranged paper flowers en masse on recycled microwave platters which were placed on all the tables. We also avoided the temptation to be too precious with the colour ratio’s on each platter. The randomness worked better. We also didn’t do the final shaping of the flowers until we were at the party site. The paper flowers travelled better scrunched up.

Sunday, 3 June 2012

The Crafter’s Way 230–Bread Clay

I have recently been frustrated by not being able to find the perfect beads and pendants for a project I have planned. After many hours of fruitless searching I decided I would make my own. Initially I planned to use salt dough but distant memories of burnt salt dough haunted me. Then I remembered a recipe a volunteer shared with me after one too many burnt batches of salt dough when I was working in Disability.

For the basic clay you will need: 1 slice of white bread (the staler the better), white glue, acrylic paint, plastic container for mixing, ice cream stick or something similar for mixing, baking paper, clip lock bags.

Step 1: Remove the crust from the bread. Tear up into small, airy pieces. Place in the container.

Step 2: Add approx 1 tablespoon acrylic paint.

OLYMPUS DIGITAL CAMERA

Step 3: Add 1 tablespoon white glue. If you are not good at guessing I encourage you to measure this accurately. Once you have done it a couple of times you will be able to do it my sight.

Step 4: Using the ice cream stick start to mix the ingredients together.

Step 5: Tear off a sheet of baking paper. Tip the mixed ingredients into your hand and start kneading. Keep kneading until the mixture feel like dough.

Step 6: By this time your hands are well and truly coloured. Don’t worry too much about this. One way to check if the clay is ready to use is to rub your hands firmly together. If the colour comes off your hands fairly easily your clay is ready to use. Gather up the bits that fell off your hands and knead in. the rest of the colour will wash off.

Step 7: Place the clay in a clip lock bag until ready to use.

To make the pendants:

Step 8: Pull off a small piece of clay. Flatten on the baking paper.

OLYMPUS DIGITAL CAMERA

Step 9: Using biscuit cutter, or any other shaping tool, punch out your chosen shape. For the rectangular pieces I flattened the used a metal ruler to cut the clay.

Step 10: Using a skewer I poked a hole for threading.
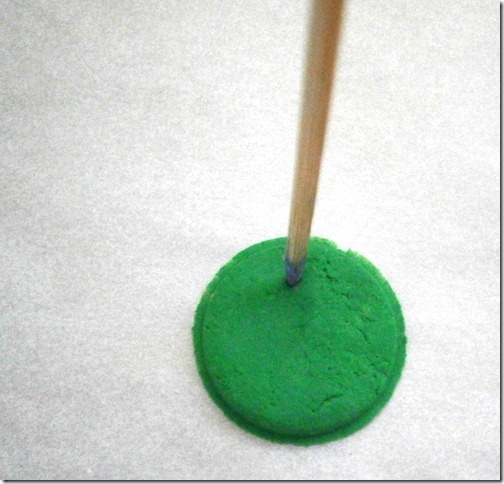
OLYMPUS DIGITAL CAMERA

Step 11: Leave to dry on the baking paper until it is firm and ‘clunks’ when gently dropped.

Step 12: When dry, seal with varnish. The more coats the glossier it gets. If you wish to embellish with paint or glitter add before varnishing.

The clay can be used the same way as you would use fimo etc; it will support a sculptural piece and colours can be mixed. It doesn’t need cooking in the oven. The clay is air dryed. The length of time necessary will depend on the humidity and the thickness of your piece. I have seen slight variations on this recipe including adding moisturizer or dishwashing liquid. In my experience I have found neither addition add nor detract from the finished clay. I had left over clay which I stored in the fridge for a week. After allowing the clay to return to room temperature it was as pliable as the first use.

I promise to add a 'finished’ image soon. The original shots were dreadful.

Monday, 28 May 2012

The Crafter’s Way 229–Recycled Business Cards

During a recent major clean out at home where no drawer was left unsorted I found way too many out of date business cards. There were cards from previous jobs, old addresses and positions. They were all still in mint condition, some in unopened boxes so it seemed a shame to simply ditch them in the bin.

I gathered up some essential supplies such as glue and scissors and the hunted for some bits and pieces to embellish each card. The beauty of this project is your ‘canvas’ is small so it doesn’t require a lot of materials or time. For all the ideas I first gave the cards a coat of white gesso. This was necessary for my gift cards as all the cards had been printed on both sides. If your old cards have only been printed on one side you can skip this step.

Idea 1a

Idea 1: Using an old teabag I stained the book pages. Once they were dry I gave them a quick press with a cool iron. I cut the pages into strips and glued them onto the card. Play around with the placement. It looks better if each strip is a little ‘off’. I waited for the paper to dry completely before attaching the piece of flat braid. Punch a hole in the corner to attach to your gift.

Idea 2a

Idea 2: For this card idea I used some hand dyed paper towel. I stamped the flower pattern randomly over the paper towel before cutting to size and glueing to card. You may find it a little easier to cut the paper slightly larger than the card, glueing then trimming to size once the glue has dried. I added an upcycled clothing badge to the centre of the flower but you could add sequins, beads and/or glitter.

Idea 3

Idea 3: This idea took a little longer than the others but was still quite simple. I cut a piece of felt to the same size as the card. I ironed scraps of fusible webbing to some small pieces of fabric. After peeling away the backing paper I placed the fabric onto the felt and fused in place. Be careful it easy to burn your fingers when using small pieces. I sewed some buttons in a contrasting colour on to the fabric before glueing the felt/fabric sandwich onto the card. For some added colour you may choose to machine sew a row of stitching around the edge of the card.

These ideas are just a few of the many ways you could decorate and embellish old business cards into unique gift tags; try red/green/gold for Christmas, pastels shades for a newborn, stamp ‘50’, ‘60’ slightly off centre for a significant birthday or even paint a watercolor wash over the card before stamping and embossing an image.

If you want to have a go but don’t have any cards let me know… I’m still drowning in them.

Sunday, 13 May 2012

The Crafter’s Way 227 - Masked Art

For those of you who also read along with my blog, http://trishalandesigns.blogspot.com, will know I have been doing quite a bit of textile surface design using a masking technique. Masking is not just limited to textiles; it can be used to create effective individual pieces of art.

masked finished 1

You will need: A pre- stretched canvas, acrylic paint in a couple of colours, tape, oil stick (available from art supply stores) and a toothbrush.

OLYMPUS DIGITAL CAMERA

Step 1: Using the tape mask off your design. For the first picture I carefully measured the grid. The second canvas was deliberately more abstract. I used clear sticky tape. I prefer to use masking tape but as I had used it all up on my textiles I resorted to the sticky tape. It works fine it is a just a little harder to see for removal.

Step 2: Once you have the design grab your first colour of paint. If you are not confident choosing colours use 2 primary colours and mix a secondary colour. You can’t go wrong; the laws of colour theory dictate that they will work. I applied the colour in a pattern.

Step 3: Apply the 2nd & 3rd colours. Wait for the paint to dry thoroughly.

OLYMPUS DIGITAL CAMERA

Step 4: Following the manufacturer’s instructions for the oil stick gently apply the oil stick to the tape. I didn’t apply evenly over every piece but you certainly can.

OLYMPUS DIGITAL CAMERA

Step 5: Using a stiff toothbrush flick the oil stick off the tape and onto the acrylic painted surface. Take care you don’t get the oil stick on your fingers. You could end up with fingerprints the envy of any forensic scientist.

masked finished 2

Step 6: Carefully remove the tape. When everything is dry, turn the canvas over. Gently tap in the corner pieces as per the manufacturer’s instructions and your unique artwork is ready to hang.

Monday, 7 May 2012

The Crafter’s Way 226–Simple Knitting Ideas


This week I’m sharing some knitting ideas for your left over yarns. These simple patterns are also ideal for introducing a newcomer to the craft as they are completed quickly and introduce some key skill; casting on/off, decreasing and adding another yarn.

knitted pendant 1

Idea 1: For this pendant I used a variegated 8 ply yarn for no other reason than I had it in my stash. Feel free to use whatever yarn you have on hand. Cast on 20 stitches. Knit 20 Rows or until piece measures 6cm. Knit a further 8 rows, this will form the casing for the cord to thread through. Cast off. Fold over 4 rows to wrong side and stitch down with coordinating thread. I used satin cord for the necklace.

knitted pendant 2

Idea 2: Similar idea to the pendant above. Again I cast on 20 stitches. This time however only knit 12 rows before casting off. Turn the piece 45 degrees so the short side is top and bottom. Fold over one edge to form casing. Finish as before.

knitted pendant 3

Idea 3: This idea introduces the concept of decreasing the number of stitches. Cast on 15 stitches. Knit 8 rows. *On the next row knit 14 stitches, cast off the last stitch. Next Row: knit 12 stitches, cast off last stitch. Next Row: knit every stitch. Repeat from * until you have 3 stitches remaining. Cast off. Form casing for cord as above.

knitted pendant 4

Idea 4: I saved my favourite for last. With this pendant you will be changing yarns. I used 8 ply for the solid colour and an inexpensive novelty acrylic for the feature. Cast on 20 stitches. Knit 8 rows. Without casting off the solid colour on the next row add in the novelty yarn. I completed 4 rows using both yarns together. You may need to vary how many rows you do depending on your choice of novelty yarn. Continue knitting 15 rows. Cast off. Using a large eye needle secure the novelty yarn into the body of the piece. Form casing for cord as above.

Now don’t go out and buy yarns especially to make these, experiment with the bits and pieces you have left over from other knitting projects. You might surprise yourself with the results.

Sunday, 15 April 2012

The Crafter’s Way 224–Crochet Bangle Tutorial

As promised here is a tutorial to make Crochet Bangles. I’ve included the instructions in both US and English language. I have used the term yarn even though I am technically using thread. For this project you will need a metal bangle, crochet hook size 2.75mm and 16m of  of my Eco Dyed Rayon thread.
crcohet final
US Crochet Language:
Start by making a Slip knot on your hook. We are now going to cover the bangle. These* instructions* will be the same for both US and English. With the slip knot on the hook place the hook under the bangle. Yarn over hook. (1) Draw hook under bangle. Place hook over bangle. Yarn over hook. (2) Pull hook through first two loops, leaving one. Repeat this step until you completely cover the bangle.*
                                                   crochet 1crochet 2
When you return to start join both ends with a slipstitch (slip st). Make 2 chains (ch). Insert hook into top of 2nd stitch from slipstitch. You should now have 2 stitches on the hook. Yarn over, draw yarn through both stitches. This is a Single Crochet (sc). Continue making sc into every second stitch until you reach the beginning again. Make another slip st (3).
crcohet 3
To make the scallops: in the same stitch as the last slipknot make a Half Double Crochet (hdc), Double Crochet(dc), Half Double Crochet(hdc) , slipstitch(slip st).# Chain 2 (4), miss 2 stitches, slip st, hdc, dc, hdc, slip st. ( all these are into the same stitch) (5). Repeat from # until you have completed the bangle. Join with a slip st.
                crcohet 4crcohet 5
English – remember the instructions * are the same for both crochet languages.
When you return to start join both ends with a slipstitch (sl st). Make 2 chains (ch). Insert hook into top of 2nd stitch from slipstitch. You should now have 2 stitches on the hook. Yarn over, draw yarn through both stitches. This is a Double Crochet (dc). Continue making dc into every second stitch until you reach the beginning again. Make another sl st.
To make the scallops: in the same stitch as the last slipknot make a Half Treble Crochet (htr), Treble Crochet(tr), Half Treble Crochet(htr) , slipstitch(sl st). # Chain 2, miss 2 stitches, sl st, htr, tr, htr, sl st. (all these are into the same stitch) . Repeat from # until you have completed the bangle. Join with a sl st.
Happy crocheting.

Sunday, 1 April 2012

The Crafter’s Way 223 - Crochet Around The World

 
crcohet bangle 2a
When my Grandmother taught me to crochet Australia was still very much immersed in our English heritage. Today we live in a different world; we are influenced by many cultures and as such often have different understandings of the same things. Craft is not immune from the differences. While recently being laid up with a broken foot I decided to do some crocheting. I googled some patterns and then came to an abrupt halt. The patterns had been written by an American and the pattern used the same words to explain different stitches. I decided to back track and make some granny squares using their patterns to immerse myself in the new language. I chose the granny square because I knew what that was supposed to look like. Funny enough after about half an hour I was confidently following the pattern.
Abbreviation US Abbreviation English
ch chain ch chain
slip st slip stitch sl st slip stitch
sc single crochet dc double crochet
hdc half double crochet htr half treble
dc double crochet tr treble
tr
trc
treble
triple crochet
dtr double treble
dtr
dtrc
double treble
double triple crochet
triptr triple treble
trip tr
tr trc
triple treble
triple triple crochet
quadtr quadruple treble
Cut out and keep this ready reckoner with your crochet patterns. Crochet Hook sizes can also vary. If you have a penchant for vintage patterns you will need to check if the hook sizes stated are imperial, that is pre-metric. For some sizes there is no comparison
Metric: mm US UK Imperial
1.00 10 Steel _
1.25 8 Steel _
1.50 7 Steel _
1.75 5 Steel _
2.00 B-1 14
2.25 B-1 13
2.75 C-2 12
3.25 D-3 10
3.50 E-4 9
3.75 F-5 9
4.00 G-6 8
4.50 7 7
5.00 H-8 6
5.50 I-9 5
6.00 J-10 4
6.50 10 1/4 3
7.00 K-10 1/2 2
8.00 _ 0
9.00 _ 00
10.00 _ 000
Next week I’ll share the crochet pattern to make the bangles in the image.

Sunday, 25 March 2012

The Crafter’s Way 222– Recycled Coffee Pod Planters

I think this would be a fun activity to do with children either at home or in a classroom setting.
k-pod planter 5b
For this project I used: Pods, the Coffee Grinds, Newspaper, Water, Buckets, 2 x different Herb Seeds and Muslin.
Before beginning you will need to remove the foil lid from the pods. Empty the used coffee grinds into another container. You need to save these, we will use them later. Wash the pods thoroughly.
Step1: Tear newspaper into strips. If you have a shredder go ahead and use the paper from that.
k-pod planter 1b
Step 2: Put the paper strips into a bucket and slowly cover with water. You don’t need the paper floating, just enough water so the paper will go mushy. I left mine for a few days but a couple of hours is usually enough time.
k-pod planter 1ab
Step 3: Drain off excess water. Tip the paper into a square of muslin and squeeze the excess water out. Save this water, you may need it.
k-pod planter 2b
Step 4: Put the paper back into a bucket. Add the coffee grinds. Do this slowly. You need the mixture to be as pliable as biscuit dough. If the mixture gets too dry add a little bit more water. If you can squeeze water out it is too wet.
k-pod planter 3b
Step 5: Add both types of seeds. Feel free to add more than two types of seeds just try to make them compatible. Mix these through mixture.
Step 6: This is the fun part. Gently flatten out the bottom of the pods. Start stuffing the mixture into the pods. You are all done.
k-pod planter 4b
My seed packets stated it would take 7-14 days before you saw anything green but within 4 days I had little green heads starting to poke through. I sprinkled the pods with water on day 7. If the ‘soil’ starts to feel dry give them a light water. This last image was taken on Day 9 after planting. All of the pods had sprouted. When ready to plant out gently loosen the soil, tap out and plant in the garden or large pot. Don’t bother removing the paper it will break down in the soil.