Showing posts with label The Crafter's Way. Show all posts

Sunday, 19 August 2012

The Crafter’s Way 240–Fortune Cookies

We made these as a little bit of fun to wrap up the party. Bowls of fortune cookies were placed on the tables when we brought coffee out.

You will need: decorative paper, hot glue gun, scissors and fortunes.

Step 1: using a glass trace off a heap of circles and cut them out. Again if you have a punch use it.

OLYMPUS DIGITAL CAMERA

Step 2: Fold the circle in half but only crease 2 cm across the middle, as indicated by the arrow. DO NOT crease all the way across.

OLYMPUS DIGITAL CAMERA

Step 3: Open out the circle and fold in half in the other direction. DO NOT crease.

OLYMPUS DIGITAL CAMERA

Step 4: Slide the fortune inside. Gently indent the crease from the first fold.

OLYMPUS DIGITAL CAMERA

Step 5: Add a drop of hot glue. You do not need much.

OLYMPUS DIGITAL CAMERA

Step 6: Fold the wings back holding the glued edges until set.

OLYMPUS DIGITAL CAMERA

Repeat until you have enough for all your guests.

You may like to write your own fortunes however I have included a link to a site that has romantic, comic and motivational fortunes for you to print off.

http://www.chinese-fortune-cookie.com/

This is my last column for The Messenger. I would like to say a huge thank you to all the readers who have actively enjoyed the column. I hope I have inspired you to let your creative spirit go free and have a play.

Sunday, 12 August 2012

The Crafter’s Way 239–Wrapping Paper

Here are 3 fun ways to decorate tissue paper/butchers paper to make your own unique wrapping papers. OLYMPUS DIGITAL CAMERA         Idea 1: Fold the tissue paper into triangles and/or rectangles. OLYMPUS DIGITAL CAMERA         Pour some dye or food colouring into a container with a neck wide enough for you to dip into. Hold one edge of the paper shape and dip the paper into the liquid. You don’t need to dip too far in, the colour will wick (travel) up the paper. OLYMPUS DIGITAL CAMERA         Continue dipping, changing colour every now and then, until the shape is completely coloured. Let the paper dry completely before unfolding. Idea 2: It doesn’t come any easier than this. Grab some acrylic paints and some sponge shapes. OLYMPUS DIGITAL CAMERA         Dip the sponge into the paint and then remove most of it. The sponge doesn’t need to be overloaded. OLYMPUS DIGITAL CAMERA         Stamp away until you are happy with your design. OLYMPUS DIGITAL CAMERA         Idea 3: After doing the demonstration piece on Tissue Paper I would recommend using Butchers Paper for this project. Using left over crayon pieces and a vegetable peeler scrape the crayon onto the paper. OLYMPUS DIGITAL CAMERA         Cover the paper with baking paper and iron. OLYMPUS DIGITAL CAMERA         If you are using tissue paper place baking paper underneath or the melted crayon will leak onto your ironing board cover (which is why I recommend butchers paper). OLYMPUS DIGITAL CAMERA         Be careful as the crayon can be deceptively hot and unmelted pieces can stick to your fingers and burn you. Just remember that for all of these projects colour mixing rules apply. The dye, paint and crayons will run together so consider your colour choices carefully to avoid a muddy brown mess.


Sunday, 5 August 2012

The Crafter’s Way 238- More Party Decorations


When I was first asked to create some party decorations for a friend’s upcoming event I really wanted to make these doily decorations. I whipped up some samples but our DIY challenged hostess wanted to go with the fluffy pompoms instead. Never mind they may be just what another party hostess is looking for.

OLYMPUS DIGITAL CAMERA

You will need: paper doilies, dye or food colouring, non- stick surface for working on, glue and ribbon for hanging.

Step 1: Place the doilies into a dye bath. If you choose to use food colouring pop a few drops into water before dipping the doilies. You will need to be very gentle as paper is very fragile when wet. Let the doilies dry thoroughly.

doily hanging2

Step 2: If the doilies are a little crinkled you will need to give them a press with a cool iron. You need them flat.

Step 3: For each hanging you will need a minimum of 4 doilies. Stack the doilies on top of each other lining up the scallops.

doily hanging 3

Step 4: Fold the stack in half, again lining up the scallops. Fold the crease firmly. Separate into the single sheets again.

doily hanging 4

Step 5: Working on the non stick surface squeeze glue on to one half of the first doily. Spread out making sure you go all the way to the edge.

doily hanging 5

Step 6: Pick up the second doily. Align the scalloped edge and press to the glued half.

doily hanging 6

If you are making a heap of these hangings do step 5 & 6 with all of them before proceeding. It gives the glue time t dry and makes handling much easier.

Step 7: Glue half of the second doily then press the third doily in place. Continue until you have only ‘half’ surface left to glue.

Step 8: Cut a length of ribbon. Glue the surface. Fold the ribbon in half and press to the glue. Then quickly press the last surface to the glued surface. Let dry before hanging.

Variations can be achieved by using different sized doilies and by mixing the colours used in each hanging.

Sunday, 29 July 2012

The Crafter’s Way 237–Craft Book Review

These books all came from the North Lakes’ Pathways Library. This selection of books will tempt even the most time challenged fibre artist to start another project.

surface workshop

Surface Treatment Workshop (745.5MCEL) by Darlene Olivia McElroy & Sandra Duran Wilson. If you like your craft books to be project based then this book is not for you. Containing 45 techniques suitable for fabric, paper and canvas you will want to clear the decks and have an artistic play date. The techniques have been broken down into 3 categories; Additive, Resist and Subtractive or Combination. The authors have tried for the most part to use readily available materials; any we can’t source here in Australia can be substituted. Each technique comes with fully illustrated instructions, tips, variations and troubleshooting guide. The gallery pages will have you rushing to use your new found techniques in your next project.

fabric books

The Art of Fabric Books (746SMI) by Jan Bodee Smiley. Once you’ve mastered the above techniques you will want to start incorporating them into something special. This book will get you started. As above this book is also divided into 3 categories; Techniques (different to above), Book Construction and Gallery. The instructions for the projects are clearly written and easy to follow. The Author encourages the Reader to use the techniques as a starting place and to add their own personal touches and style.

paper jwellery

The Art of Jewelry – Paper Jewelry (745.594LEV) by Marthe Le Van Yes, you read that right, Paper Jewelry. The projects in this book make my paper beads look sad. The projects range from simple to intricate, elegant to funky. The photo on the front cover is surprising easy to make yet its elegant geometry will have you fielding endless compliments. Nobody will believe it has been made from vellum. The Gallery pages will leave you wondering, “how did they do that?”

fibres

Fibres (677 KNA) While not strictly a craft book, I found it in the Science Section, I found it infinitely interesting. Understanding the science of the materials and products I use is important to me. Rather than restricting my practice it opens up my options as I understand what rules I can break safely. Even if you have only ever wondered in passing “why does wool felt yet cotton doesn’t?” you will enjoy this book. It is an easy read with simple diagrams. Perfect as an introduction to the science of fibres.

Sunday, 22 July 2012

The Crafter’s Way 236–We’re Having A Party Part 3


I convinced our DIY challenged hostess that we not only needed some sort of activity for the kids but that with a little colour coordination it could add to the decorative feel of the party.

pinata5

To make these PiƱatas you will need: recycled containers: tissue boxes, milk containers etc. just try to make them square/rectangle as they are easier to cover; crepe paper in your chosen colour theme, glue or tape, scissors , ribbon or string for hanging.

pinata1

Step 1: If using milk containers make sure they are clean and dry.

Step 2: Make a hole in one of the corners of the container. Cut some lengths of ribbon and poke through the hole from the inside. Tie a knot to prevent the ribbon from pulling through.

pinata3

Step 3: Drop some wrapped lollies into the container and seal. If using the milk container cut the top to make sure it sits flat.

pinata2

Step 4: Cut one inch wide strips of crepe paper. Fringe one edge. Be careful you don’t cut through.

Step 5: Secure the crepe paper with either glue or tape as you wind around the container. Change colour every now and then to add variety.

pinata4

Step 6: Continue until the container is covered. Before you cover the top you will need to secure some ribbon to hang the piƱata. When covering the top of the container you glue/tape the strips in rows, you won’t be able to wrap around.

Allow yourself plenty of time to make these as while they are simple they are deceptively time consuming; especially if you have to wait for the glue to dry.

Sunday, 15 July 2012

The Crafter’s Way 235 - What’s On

What’s On

Mika-McNaughton Gabi. Black Cockatoo Fodder.2012.oil on linen.90x90cm

'In the Shadows of Mt Tibrogargan' is an exhibition by Redcliffe based artist, Gabi McNaughton. ‘In the Shadows of Mt Tibrogargan’, is an extension of a continued obsession I have in exploring the Australian native flora in its natural state. Not only does the tranquilly, stillness, symmetry and beauty of this particular landscape transfix me, but I am constantly reminded, what the traditional owners of this land ‘The Kabi Kabi’ (Gubbi Gubbi) people have known for thousands of years, just how perfect the balance of nature under this magical mountain is,’ States Gabi. Gabi really hopes locals come and visit her exhibition, “It would be nice, as I feel that what is on our doorstep, (the Glass House Mountains National Park) is very much worth protecting.” You can enjoy 'In the Shadows of Mt Tibrogargan' at Caboolture Regional Art Gallery, 4 Hasking St. Caboolture from the 20th July - 19th August.

Mika-McNaughton Gabi.Sapling silhouettes.2012.oil on linen.92x122cm

The winter BrisStyle indie Designers Market are set to rock the gorgeous leafy grounds of St Augustine's Church on Racecourse Road, Hamilton on Saturday July 14 . Locals have learnt to keep an eye out for BrisStyle’s fabulous markets with their soulful and original creations. Don’t miss out make a note in your diary now; Saturday July 14 2012.   9am-2pm at St Augustine's Church Hall and grounds, Racecourse Road, Hamilton

Pine Rivers Art Gallery is hosting “Baltic Miniatures”: July 11 – August 18. Presented by The Australian Forum for Textile Arts (TAFTA) this collection of miniature textiles has been selected from the International Baltic Miniature Textile Triennial, a world class competition hosted by Gdynia City Museum, Poland. Sharing the exhibition space at the gallery is “State of the Art Quilt – Retrospective”. You will have a rare opportunity to see a selection of past competition quilts while partaking in Artist Talks and Workshops. Booking are essential for workshops. For more information contact Pine Rivers Gallery on 3480 6941.

Artisans’ latest exhibition, Reboot: Function, Fashion and The Sneaker is sure to change the way you view your humble footwear. From June 21, practicality and design will collide in this fascinating display of designer sneakers. On exhibit will be cutting edge innovations and milestone designs from key supporters adidas, Converse, Nike, PUMA and Reebok. Sneaker Freaker Magazine will treat visitors to a rare viewing of sneakers from their collection. Shoe connoisseurs will love the designs from Marc Newson, Stella McCartney and Yohji Yamamoto to name a few. For more information visit www.artisan.org.au

Sunday, 1 July 2012

The Crafter’s Way 224– Paper Table Runner

Flower Centrepiece 4

We’re Having A Party! Not me personally but I have been roped into the decorating committee of one. The hostess has chosen her colour theme of pink and red. I tried to suggest the addition of purple but no go. Never mind I will just have to wear those shoes I bought somewhere else.

The first item we decided on was the table decorations. The hostess wanted lots of flower but the expense was prohibitive so we decided to make our own. Even our DIY challenged hostess was able to help make these.

We used: Tissue Paper in our chosen colours; scissors and staples.

Flower Centrepiece 1

Step 1: Open out the tissue paper but don’t separate the sheets. The tissue paper I bought had 10 sheets. If you have a large flower punch use that, it will be much quicker. I don’t have one so I traced a circle onto cardboard then scalloped the edges. Place the card onto the tissue paper and trace out.

Step 2: I placed a couple of staples into the centre of each flower before cutting out. It helped hold the 10 sheets together and made cutting out quicker.

Flower Centrepiece 2

Step 3: When you have cut out all your shapes you can start forming the flower. Gently separate the first layer of tissue paper from the rest. Twist it up tightly toward the centre.

Flower Centrepiece 3

Step 4: Continue pulling each layer of tissue up toward the centre. As you work out don’t pull the layers so tightly. Continue until there are no more layers. Gently shape petals into flower shape.

We arranged paper flowers en masse on recycled microwave platters which were placed on all the tables. We also avoided the temptation to be too precious with the colour ratio’s on each platter. The randomness worked better. We also didn’t do the final shaping of the flowers until we were at the party site. The paper flowers travelled better scrunched up.

Monday, 25 June 2012

The Crafter’s Way 233–Craft Q & A

Over the years I have been writing this column I have received lots of questions via email. Many have generated ideas for the columns others I have replied to privately. After a recent influx of questions I decided to do a whole column especially dedicated to Q & A’s.

Loani Prior

Q: I recently managed to remove some colour from my girlfriend’s expensive bedspread and wonder if you may be able to over dye it or failing that give some advice on fixing the problem? A good deed has landed me in the doghouse. Please help.

A: Oh no, I feel you are destined to be in the dog house a bit longer. I googled the bedspread and it appears to have a self stripe/pattern throughout. This is almost impossible to overdye. I also don’t custom dye basically due to lack of time. If you are feeling very brave and you still want to have a go I can suggest you try Dylon’s Antique Grey. You will need to weigh the bedspread first so that you know how many pkts to buy; I don’t think you would get away with any less than three. Failing that my next suggestion would flowers, chocolate and champagne.

Q: My daughter has asked me to make her a tea pot cover (to keep the tea warm!) also to look pretty. I am wondering if you have any patterns. I knit and crochet so would be very happy if you can find some, I am new here in Australia and not sure where to look for them.

A: I’ve added a couple of links to some free websites. Most of our council libraries have a great range of craft books. Ask the staff for a bit of help to search the catalogue; you can request books from other libraries. http://tipnut.com/rosy-tea-cosy/ and http://www.grandpurlbaa.com/www.grandpurlbaa.com/Free_Patterns.html

Q: Is there any difference in all the ‘white glue’ products available.

A: I tend to use the most basic white glue for every project. While it terms of adhesive there appears to be very little difference be careful if you using it as top coat. Some white glues will yellow over time so it is best to use archival quality products for these projects. For more information on glues visit my blog http://trishalandesigns.blogspot.com.au and click on archives 2007.

Q: I want to paint on fabric. Do I have to buy fabric paint? It is so expensive.

A: No you don’t. Anyone who has ever got acrylic paint on their clothes knows it doesn’t come out in the wash. Having said that the benefit of paint designed especially for fabric is that the finished feel is not stiff. You can purchase a textile medium which you add to acrylic paint. This will improve the finished feel while not diluting the colour. This will be economical if you are planning to do a lot of fabric painting. If you are only planning on one project buy the fabric paint.

Sunday, 17 June 2012

The Crafter’s Way 232–Craft Book Review

These books all came from the North Lakes’ Pathways Library. I love that it is open on Sundays. I have so many friends with new babies that my eye was drawn to this selection of craft books for babies and children.

knitting baby

Blankets, Bears and Bootees (746.432BLI) by Debbie Bliss. This book contains 20 irresistible knitting patterns suitable for babies’ first year. The author has designed a wonderful range of baby blankets including a choice of 7 styles; from practical to heirloom. The booties are cute and quick to make up while to toys are sure to be well loved. I love the idea of the knitted bean bag style bird. Debbie Bliss is an internationally renowned knitwear designer. Be sure to check out her other baby knitwear books; Simply Baby, Essential Baby and Essential Kids.

Crochet baby

Simple Crochet for Cherished Babies (746.434DAV) by Jane Davis. From knitting to crocheting; I know many people do both but most of have a preference for one over the other. I prefer crocheting. You don’t have to have years of experience to tackle the patterns in this book. All the projects use basic crochet skills; simple rectangles, squares and tubes that work in all over stitch repeats. You can do that, right? Even if you don’t feel quite ready to tackle the bigger projects the author has included a couple of cute crocheted ball patterns, just the right size for small hands.

Animal baby

50 Fabric Animals (745.5924FIFT). I’m not really a stuffed toy fan but this book still took my fancy. This book includes a mix of styles from the classic bear to bright funky knitted bunnies. Not all the patterns are stuffed toys either; there is appliquĆ©s and scarfs to make. I particularly loved the 2 oversized dog projects. One is made from a floorcloth the other from patchwork fabric. Both are adorable.

baby play

Made to Play (745.592HENR) by Joel Henriques. This book includes 35 projects to spark your child’s imagination. There are some great ideas in this book, something for every child’s interests whether they love dress up, music or construction. You will need to use a bit of your own imagination and creativity as well. The diagrams are amateurish and difficult to follow, however the written instructions are much clearer.

Sunday, 10 June 2012

The Crafter’s Way 231–Winter Craft Blogs


It’s been a little while since I did a blog roll. These blogs all feature some terrific winter craft ideas.

http://www.mesewcrazy.com/2011/12/15-minute-no-sew-scarf.html can’t do much better than whipping up a snazzy scarf in 15 mins. This is super simple. Make one in every colour of the rainbow.

knotted scarf me sew crazy

http://rosmademe.blogspot.com.au/2012/01/roll-on-2012-first-tutorial-of-2012.html Never lose your matching knitting needles again. Store them in one of these practical needle rolls. With a few adjustments to the size you could make one for your crochet hooks and/or paint brushes.

http://deerlittlefawn.blogspot.com.au/2011/11/crochet-button-pattern.html Winter is perfect crocheting weather. Whip up a few of these cute buttons with your left over yarn.

crochet buttons deer little fawn

http://colourinasimplelife.blogspot.com.au/2012/03/granny-bobble-stripe.html I don’t know if it is the colour or the texture that caught my eye but either way I love this scarf. Be sure to check out their crocheted owl pattern.

http://craftyiscool.blogspot.com.au/2011/01/wanna-make-monster.html if crochet is your chosen craft this site has heaps of basic Amigurumi patterns suitable for beginners.

http://carolynshomework.blogspot.com.au/2011/08/sew-and-tell-granny-square-birdhouse.html Sick of the same old granny squares? Try one of these crocheted bird houses.

Crochet Birdhouse4_thumb

These last few are not strictly winter crafts but I juts couldn’t leave them out.

http://gardenmama.typepad.com/my_weblog/waldorf-window-stars/ If your young ones are into origami this window start will keep them busy for a little while. While not strictly a craft site its worth a visit for the hints.

http://www.homemademamas.net/2012/05/knotted-headband.html Don’t throw out that old stretched t-shirt make it into a very comfortable headband. This is a no sew project that will have you making heaps of these in no time.

homemade mamas knotted headband

http://saltypeanutstitchery.blogspot.com.au/2012/05/bicycle-panniers-tutorial.html This saddlebag pattern almost makes me want to buy a pushbike, well, almost. There is no doubting this is an idea that combines function and form.

Have fun.

Sunday, 3 June 2012

The Crafter’s Way 230–Bread Clay

I have recently been frustrated by not being able to find the perfect beads and pendants for a project I have planned. After many hours of fruitless searching I decided I would make my own. Initially I planned to use salt dough but distant memories of burnt salt dough haunted me. Then I remembered a recipe a volunteer shared with me after one too many burnt batches of salt dough when I was working in Disability.

For the basic clay you will need: 1 slice of white bread (the staler the better), white glue, acrylic paint, plastic container for mixing, ice cream stick or something similar for mixing, baking paper, clip lock bags.

Step 1: Remove the crust from the bread. Tear up into small, airy pieces. Place in the container.

Step 2: Add approx 1 tablespoon acrylic paint.

OLYMPUS DIGITAL CAMERA

Step 3: Add 1 tablespoon white glue. If you are not good at guessing I encourage you to measure this accurately. Once you have done it a couple of times you will be able to do it my sight.

Step 4: Using the ice cream stick start to mix the ingredients together.

Step 5: Tear off a sheet of baking paper. Tip the mixed ingredients into your hand and start kneading. Keep kneading until the mixture feel like dough.

Step 6: By this time your hands are well and truly coloured. Don’t worry too much about this. One way to check if the clay is ready to use is to rub your hands firmly together. If the colour comes off your hands fairly easily your clay is ready to use. Gather up the bits that fell off your hands and knead in. the rest of the colour will wash off.

Step 7: Place the clay in a clip lock bag until ready to use.

To make the pendants:

Step 8: Pull off a small piece of clay. Flatten on the baking paper.

OLYMPUS DIGITAL CAMERA

Step 9: Using biscuit cutter, or any other shaping tool, punch out your chosen shape. For the rectangular pieces I flattened the used a metal ruler to cut the clay.

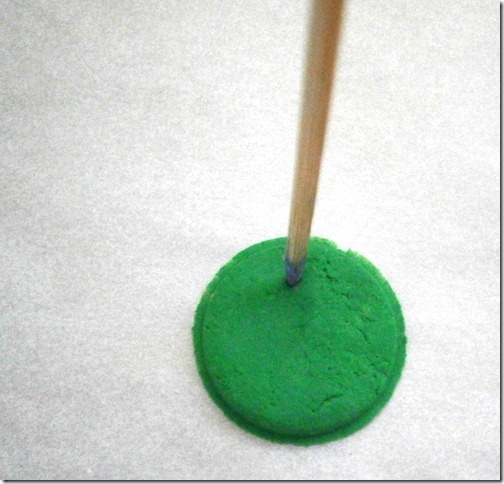
Step 10: Using a skewer I poked a hole for threading.
OLYMPUS DIGITAL CAMERA

Step 11: Leave to dry on the baking paper until it is firm and ‘clunks’ when gently dropped.

Step 12: When dry, seal with varnish. The more coats the glossier it gets. If you wish to embellish with paint or glitter add before varnishing.

The clay can be used the same way as you would use fimo etc; it will support a sculptural piece and colours can be mixed. It doesn’t need cooking in the oven. The clay is air dryed. The length of time necessary will depend on the humidity and the thickness of your piece. I have seen slight variations on this recipe including adding moisturizer or dishwashing liquid. In my experience I have found neither addition add nor detract from the finished clay. I had left over clay which I stored in the fridge for a week. After allowing the clay to return to room temperature it was as pliable as the first use.

I promise to add a 'finished’ image soon. The original shots were dreadful.

Monday, 28 May 2012

The Crafter’s Way 229–Recycled Business Cards

During a recent major clean out at home where no drawer was left unsorted I found way too many out of date business cards. There were cards from previous jobs, old addresses and positions. They were all still in mint condition, some in unopened boxes so it seemed a shame to simply ditch them in the bin.

I gathered up some essential supplies such as glue and scissors and the hunted for some bits and pieces to embellish each card. The beauty of this project is your ‘canvas’ is small so it doesn’t require a lot of materials or time. For all the ideas I first gave the cards a coat of white gesso. This was necessary for my gift cards as all the cards had been printed on both sides. If your old cards have only been printed on one side you can skip this step.

Idea 1a

Idea 1: Using an old teabag I stained the book pages. Once they were dry I gave them a quick press with a cool iron. I cut the pages into strips and glued them onto the card. Play around with the placement. It looks better if each strip is a little ‘off’. I waited for the paper to dry completely before attaching the piece of flat braid. Punch a hole in the corner to attach to your gift.

Idea 2a

Idea 2: For this card idea I used some hand dyed paper towel. I stamped the flower pattern randomly over the paper towel before cutting to size and glueing to card. You may find it a little easier to cut the paper slightly larger than the card, glueing then trimming to size once the glue has dried. I added an upcycled clothing badge to the centre of the flower but you could add sequins, beads and/or glitter.

Idea 3

Idea 3: This idea took a little longer than the others but was still quite simple. I cut a piece of felt to the same size as the card. I ironed scraps of fusible webbing to some small pieces of fabric. After peeling away the backing paper I placed the fabric onto the felt and fused in place. Be careful it easy to burn your fingers when using small pieces. I sewed some buttons in a contrasting colour on to the fabric before glueing the felt/fabric sandwich onto the card. For some added colour you may choose to machine sew a row of stitching around the edge of the card.

These ideas are just a few of the many ways you could decorate and embellish old business cards into unique gift tags; try red/green/gold for Christmas, pastels shades for a newborn, stamp ‘50’, ‘60’ slightly off centre for a significant birthday or even paint a watercolor wash over the card before stamping and embossing an image.

If you want to have a go but don’t have any cards let me know… I’m still drowning in them.